Saturday, August 30, 2014

Bangs for Thin, Wavy Hair


It happened.  I got the itch for bangs.  After months of Googling photos of celebrities and people with bangs AND wavy hair, I became frustrated that there were very limited "before" and "after" comparisons.  So when I decided to take the bang plunge I opted to document it in hopes of helping other ladies who are interested in bangs!

Past Hair Type
- Thin
- Fine
- Curly ( 3A or 3B ish)


Then my locks got long and heavy!  The top straightened out so I decided to cut it, assuming it would curl back up to it's previous glory.  I was wrong.


Current Hair Type (post-baby): 
- Thin
- Fine
- Wavy/Curly (2A or 2B depending)


I had bangs when I was a small child, I mean, EVERYONE seemed to have bangs in the early 90s, right? I had such curly hair after adolescence that bangs were NEVER on the table.  After having pregnancy reduced my curls to beachy waves

 However, after having a baby my curls have reduced to beachy waves and I became fascinated with the thought of curls to add a little "edge" to my face.  This, plus realizing that my faint/thin my eyebrows make my forehead look larger, sealed my decision to add some bangs to my look.


Bangs with waves/curls are tricky because waves are often unpredictable.  However, the benefit of adding bangs to waves is that they can be straightened without looking awkward next to the curls.  My goal is to be able to wear them casually wavy.


Celebrity/Pinterest Inspiration:
This is the general look I want.  Of course, I don't have a personal team of stylists and makeup artists to help "perfect" it for events, but you can see the idea.


I found a lot of tips from this YouTube video: https://www.youtube.com/watch?v=oSzkzSG4KNQ

Please excuse my late night, make-up free, photos! 


1. Form your triangle!  (Mine is very small... I wanted to take baby steps just in case I botched my hair)


2. Trim bangs to desired length.  Initially, I went for the side bangs. I kept going back and forth between wet and dry cutting to ensure I was keeping them even AND making sure the hair wasn't going to curl up too short.   


As you can see, I just them long to make sure they would not dry too short.  I trimmed and adjusted a few times.  There is a steeper taper on my left because of where my natural part is.


Before and After:  Subtle difference.  


The next night I took the bangs a step further to see-through fringe bangs!  Mine were too thin at first, so I pulled more "bangs" from the triangle technique.   Then, I trimmed a tiny bit more to keep the ends out of my eyes.  
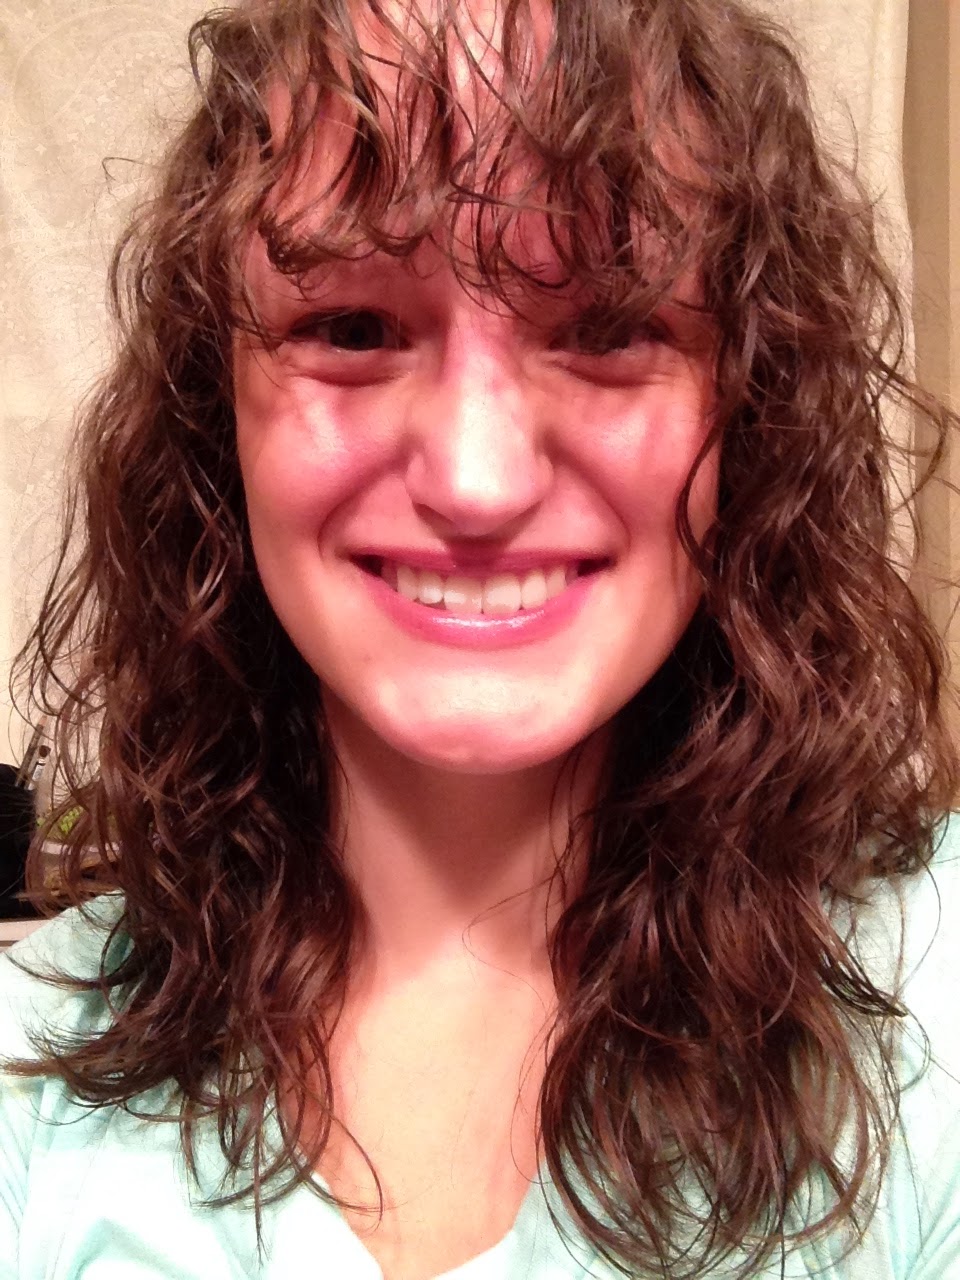


This final results! 


Oddly, my hair curled up more than normal for these pictures. 
We will see how I like it over time!   I can't wait to see how they look with different hairstyles.


***UPDATE**
Three months later I am still a fan of the bangs!  It is different having to trim them every 3-4 weeks so they don't poke me in the eye... but it's totally worth the hassle!  I prefer to wear them straightened instead of wavy which wasn't explained in the initial tutorial.  Trial and error :)


*** Update, 1.5 years later ****

I am still loving the bangs! :) 


Sunday, December 1, 2013

Wedding Invitation Ornament


I struggle to think of creative, personalized wedding gifts.  Of course, "check the registry" is an obvious answer, but sometimes it's nice to come up with something thoughtful and special in addition to the requested oven mitts or bath towels.  I've known several couples to be married this year and wanted to create something special for them from their wedding invitation.


I fell in love with the other Wedding Invitation Ornament posts, but I never found a very detailed guide on how to do it.  If you don't know- I'm a girl who LOVES detailed instructions.  That said, here is my rendition of a Wedding Invitation Ornament.


Wednesday, November 20, 2013

First Indoor Infant Photography Session

I'm so excited!  I had the opportunity to shoot a sweet newborn last week.  I used tips from assorted photography resources to set up a studio in the family's home so they did not have to travel.  Shooting babies indoors is much trickier than shooting them outside.  A: Indoor lighting is usually terrible.  B:  Using a flash on a sleepy baby is just rude, poor thing!  I set my impromptu studio (kitchen chairs, large blanket, and rubber bands) near a large glass door and got some pretty good shots!


Keep looking to see the rest of my shots!

Thursday, October 31, 2013

Jack-in-the-Box Toddler Costume

I love a good pun.  I think they are fantastic, so I incorporated one into my son's Halloween costume.  I decided he was going to be a Jackson-in-a-Box.  I searched for tutorials on making a homemade costume (I didn't want to shell out $20 for a costume the kid may or may not wear), but if course I couldn't find one so I made one in hopes it may assist another mama one day.  I did base this costume from this costume I found, but the original blog is private.


Keep reading for my "How To" on the hat, neck bunting, and box for $7!

Monday, October 21, 2013

Beginner's Iced Coffee


I use the word "beginner" because I'm barely entering the world of liking coffee.  This is my idea of coffee:

40% milk
25% sugar
25% mocha/caramel flavor
10% coffee.
                   
over ice. 


According to my husband, that doesn't count as coffee. I'm trying though!  If coffee is an acquired taste for me, I have to start somewhere, right?  Thank goodness I've found some recipes I like!

Friday, October 11, 2013

Photoshop Action: Coffeeshop Sunkissed 2

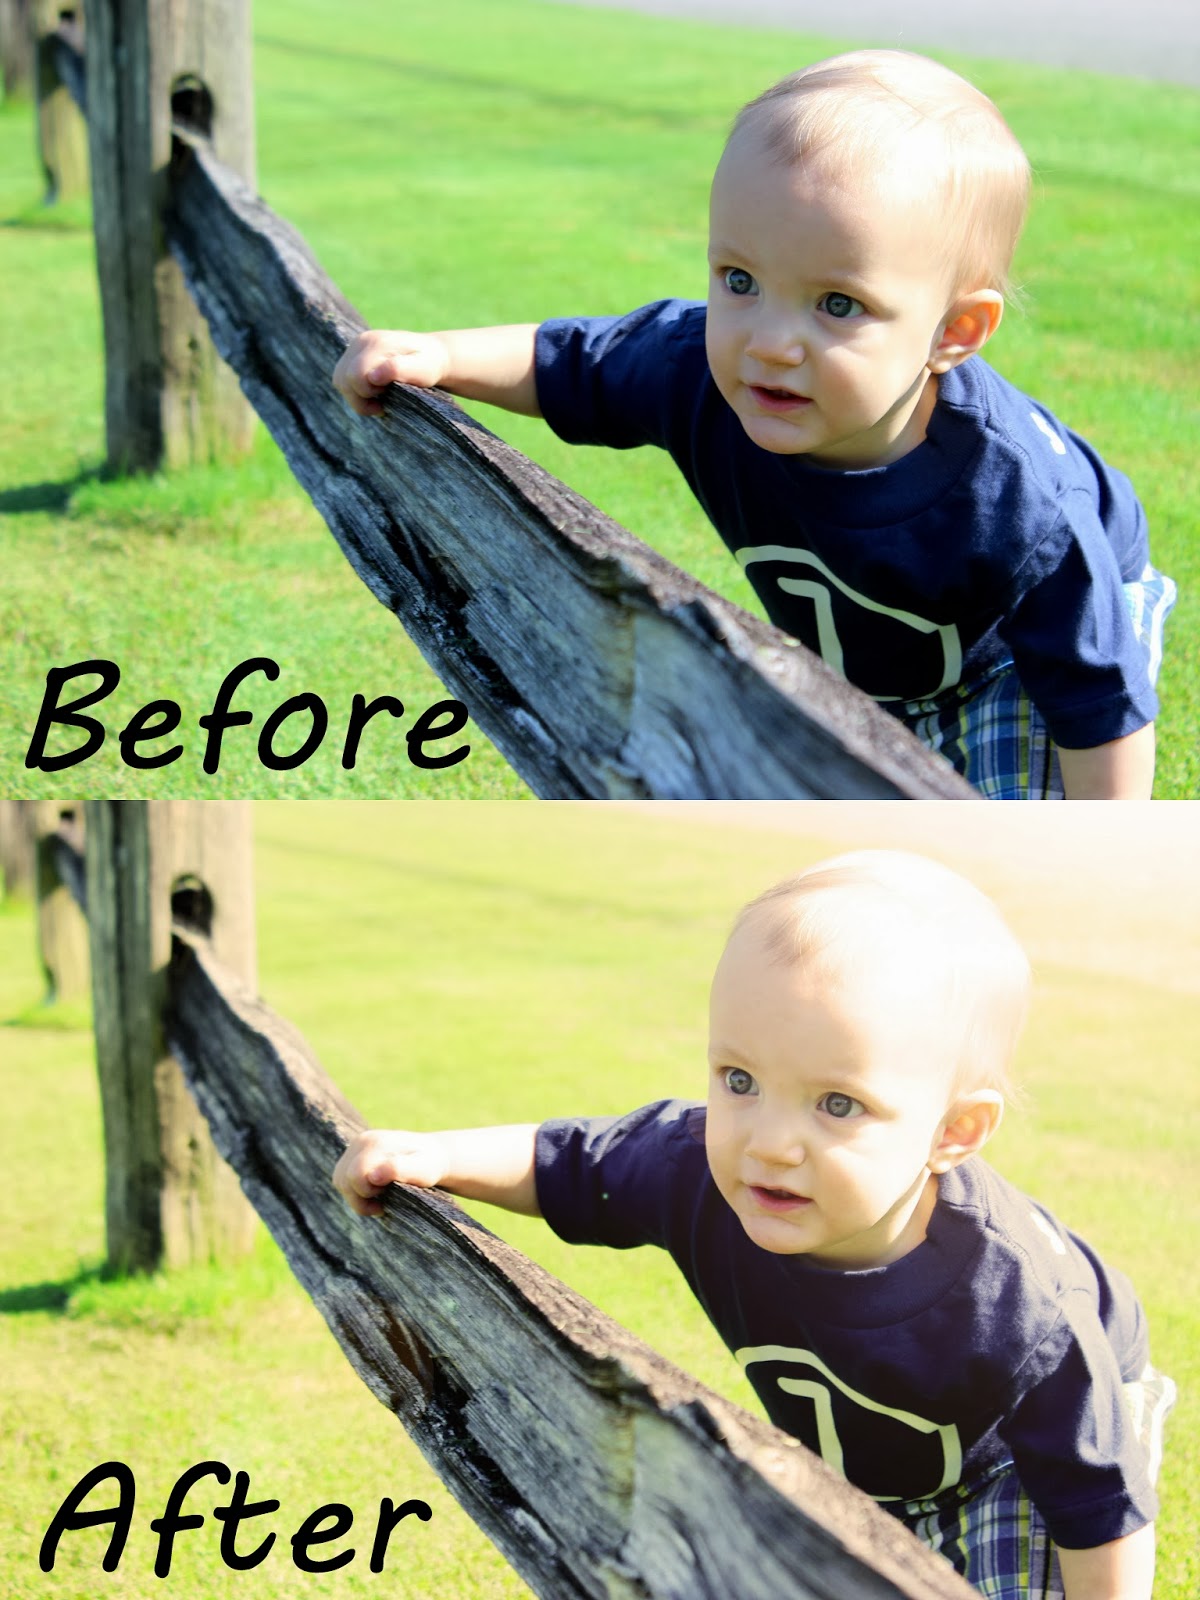
I discovered an incredible resource for photo editing: http://www.thecoffeeshopblog.com/.  The writer, Rita, provides one of my favorite things: free Photoshop Actions!  These actions are great for aspiring photographers who know the basics of Photoshop Elements or CS but are trying to step up their game.  This is a before and after of a newer action called "Sunkissed 2" that I used on one of my kiddo's 12 month photos.


Tuesday, August 13, 2013

Birthday Photo Banner


For my son's first birthday, I wanted to display photos of him from Month 0- Month 12.  As I Googled ideas for this, I came across the cutest birthday photo banners!  I decided to make my own and this was my process: