

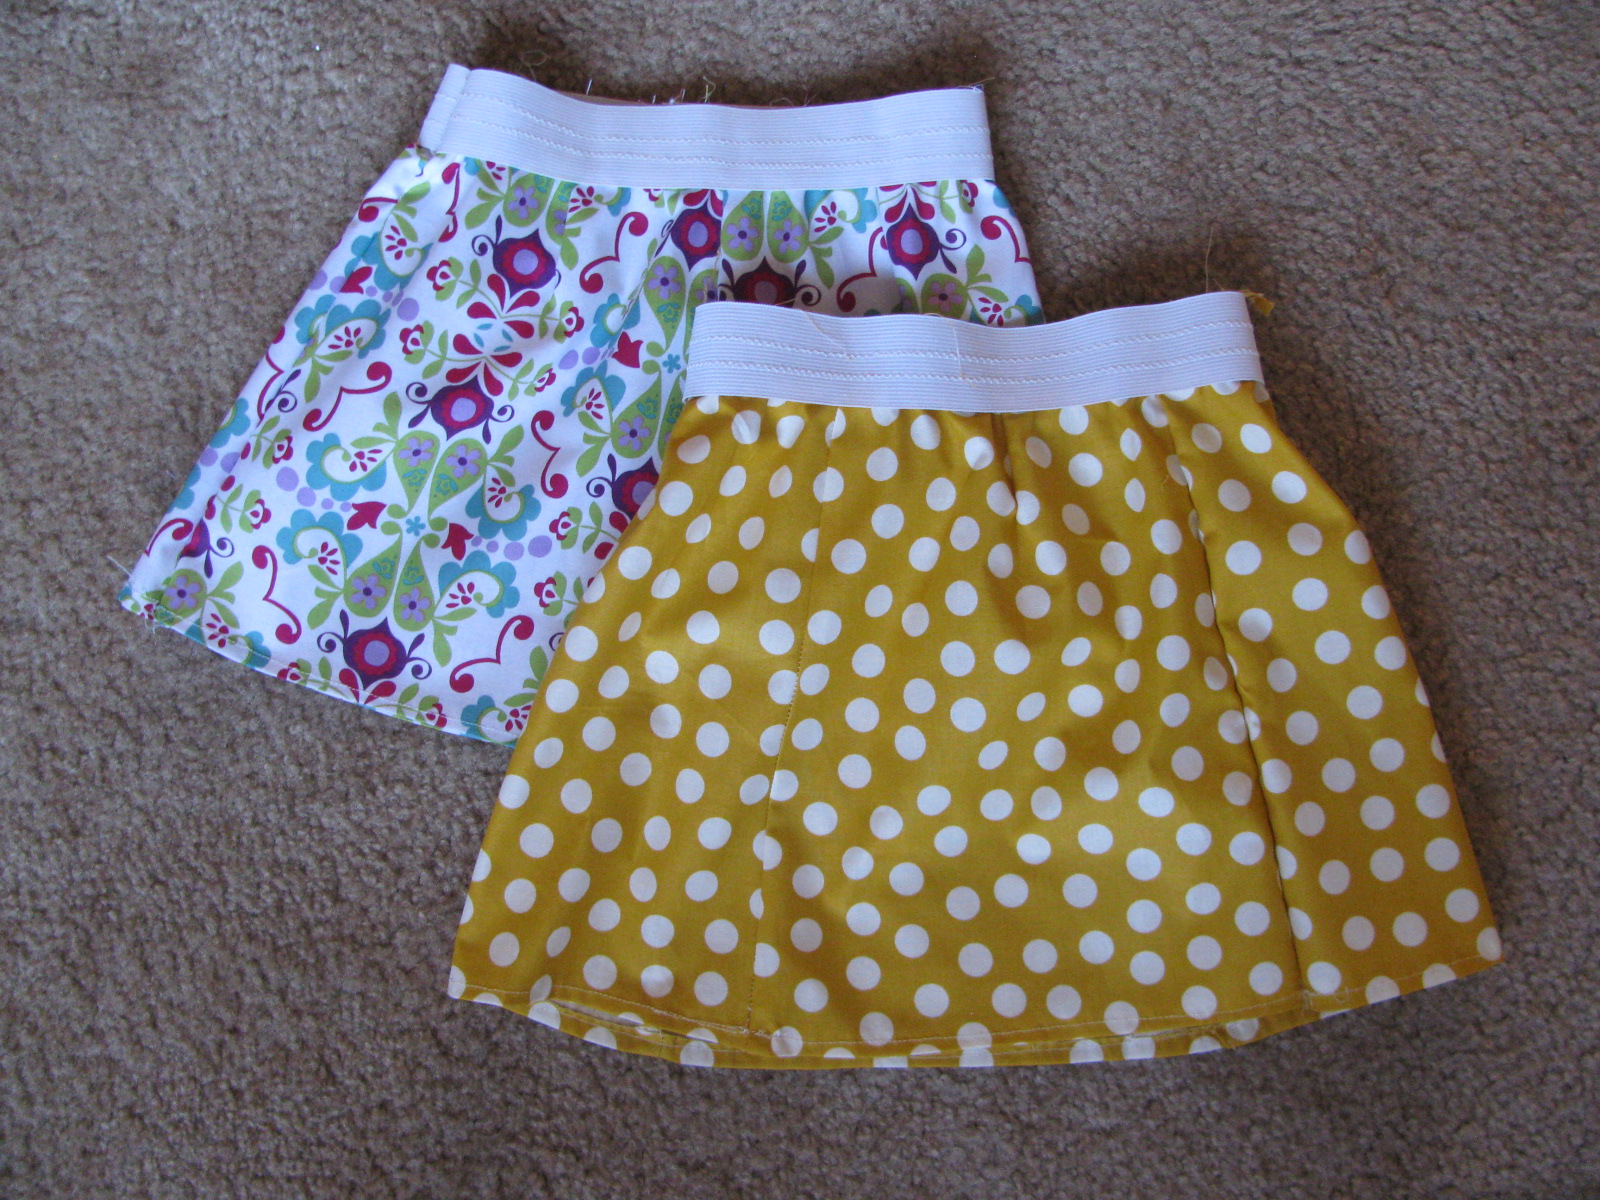
I'm a beginner at sewing. I searched and searched for a simple 1-yard skirt with an elastic waistband, but the tutorials were not very clear. So, I read a bunch or tutorials and came up with my own skirt plan that didn't involve crazy zippers and button holes (the thought of doing those TERRIFY me). Anyways, the pictures above show the adult version and the child version of this skirt. Of course, my cool tomboy niece has it scrunched up in the back :) Four-year-old's are awesome.
If you have any questions or improvements to this tutorial, please let me know =] I'd be happy to talk with you.
Here is my process:
Materials:
- Fabric (1 yard)
- Elastic (same inches as waist, NOT stretched) (I used 1 inch)
- Pins
- Thread
- Iron/ Ironing Board
- Measuring tape
- Scissors
Optional:
- Netflix or Hulu for background entertainment <3
1. Determining size and how to cut your fabric.
This was the hardest part for me. I didn't want to start hacking up fabric; I knew I needed the numbers! I determined how long I wanted my skirt (lazy me, the length of the bolt) and I measure my desired waist size. I also wanted the skirt to "flow" out some, but I didn't exactly want it to look like a poodle skirt, so I needed to incorporate that into my measurements. I decided to use 4 pieces of fabric cut into tall trapezoid shapes like this:

I planned on making more skirts like this if it worked out, so I made a sizing formula to help just in case a friend wanted one. I ended up making one for my little niece, so there are two examples of the math I used. Hopefully it is easy to follow! Essentially, you need to cut 4 rectangle panels then trim them into trapezoids as shown in the above picture so the skirt will have some "body" at the bottom. On my first skirt, I added 5 inches of body which was not enough. On my nieces skirt, I added 10 inches. For a future adult skirt, I will probably add 10-15 inches of body on the bottom fabric to make it fuller.
Quick Sizing
Elastic length = Waist size
Fully stretched elastic = Length of top fabric total
Bottom fabric total = Length of top fabric + 10-15 inches
Divide "bottom fabric total" and "top fabric total" by 4 to get individual measurements for the panels.
Note: Because the skirt is elastic and not fitted, I didn't stress about keeping "1/2 inch for hemming" because it didn't change the outcome of the skirt. It's a "Beginner" skirt- I didn't want to get too crazy. If you are concerned about that, just add that 1/2 inch to your measurements.

2. Cutting Your Panels
Before cutting my rectangles into trapezoids, I ironed the angles down so I would have a crease to follow. You can see how the bottom edge is wider. When you place your 4 panels together, it forms an arc at the bottom. There is a better of this effect later =]


Yup. The exciting part! Sew the four panels together and hem the bottom edge. My mistake on the first two skirts (yellow dot fabric) was not folding the seams twice to avoid unraveling after wash. The skirt looks fine, but I had to cut some stings off after the first wash.


4. Adding the Elastic
Divide your already cut elastic into fourths and mark the divisions with three pins and add two on the ends. See the yellow pins?

Match your five pins to the three seams and two ends of the fabric and pin together. I made sure my fabric wouldn't peek over my elastic band by attaching it 1/4 inch higher than the fabric.


Next, stretch each panel and add more pins in the middle to ensure the elastic and fabric stay where you want them. Then, sew the elastic to the fabric, stretching the elastic to the fabric as you go. I used a zig-zag stitch when sewing on the elastic to help the stitches expand and contract with the band.

5. Connect your skirt
Lastly, sew the panels and elastic together forming your skirt. Back-stitch over the elastic a few times for extra security. Now, go try it on! Here are some photos of the 3T version of the skirt Sorry for the awkward skirt-leg picture, I just wanted you to see the skirt's body. I'll post more pictures of the adult skirt next time I wear it!

My niece - she's also modeling her hair bow.


Let me know if you try this! - Jana

AWSOME GONNA TRY IT BUT I JUST DONT HAVE A STECHING MACHINE
ReplyDeleteI love this idea. It's so practical and looks easy for a beginner sewist like myself. I will try this and let you know how mine turned out.
ReplyDeleteDo you need a serger for this project? Because I have a Bernina sewing machine.
Hey Brianna! No, I didn't use a serger. I think using a serger on the seams would be helpful though to reduce fraying! The first skirt I made frayed up a LOT after the first wash. For my second, I ended up double folding my seams before sewing the panels together to cover up the fabric edges. It seemed to help, but a serger would have been more helpful ;)
DeleteThis comment has been removed by the author.
ReplyDeleteMost quick clothing projects that I make I usually do French seams works out really well and no fraying!!! video to follow!!!
ReplyDeletehttps://www.youtube.com/watch?v=nvb2TaHUu-U#t=84
What type of elastic waistband did you use?
ReplyDelete